OUTLOOK WEB APP AND USING WEBMAIL
Welcome to Webmail and Outlook Web App
First of all you need to LOG IN to your WEBMAIL account which is on the cloud at http://login.livemail.co.uk
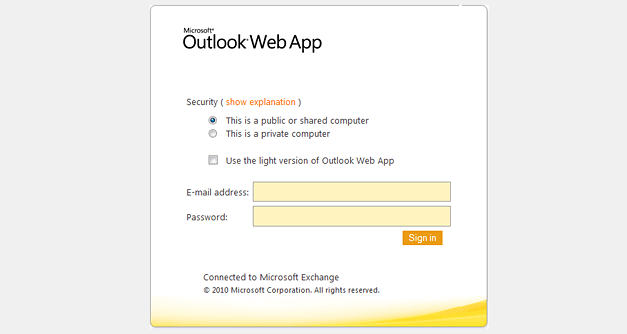
Figure 1. Microsoft Outlook Web App log-in screen
Once you have cucessfully logged in you will see the main dashboard :-
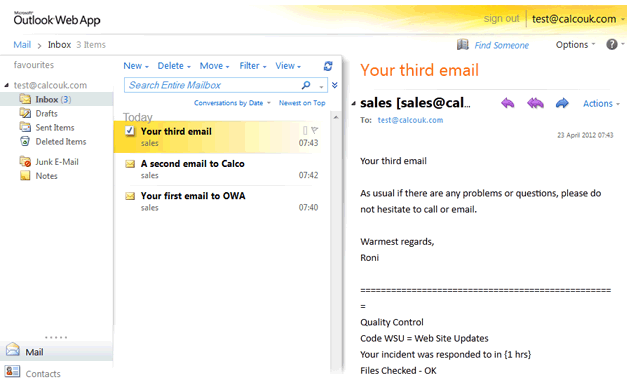
Figure 2. The OWA Dashboard
The dashboard is where most of the major functions are acessed from. In the above screenshot the basic email functions are listed in blue :-
NEW : Create a new email
DELETE : Move selected email(s) to the Deleted Items folder or erase email(s) completely**
MOVE : Move email from one place to another
FILTER : Categorise and organise your email and manage your folders
VIEW : Set out the dashboard the way you like it (have your viewpane under messages or to the side etc)
SEARCH ENTIRE MAILBOX : This is the FIND facility - it searches the entire mailbox.
![]() This icon allows you to check for new messages that have arrived between logging in and right now. (Check for new mail)
This icon allows you to check for new messages that have arrived between logging in and right now. (Check for new mail)
![]() This is the advanced search icon. Adds a few more options to the search facility.
This is the advanced search icon. Adds a few more options to the search facility.
DELETING AN ITEM MOVES IT TO DELETED ITEMS; it isnt erased and it still counts towards your allowable on-line quota until you empty the trash (deleted items folder)
SENT ITEMS also count towards your quota as do the contents of any of the Outlook Web App folders.
When you reach your limit a message warning the sender that YOUR email box is full and their message could not be sent.
** To delete an email completely ... SELECT IT (or select multiple emails)
Once selected ... Hold down the SHIFT KEY on your keyboard and TAP the DELETE KEY on your keyboard. The selected email will be erased , it will NOT go into the trash, it will be deleted immediately.
The minimum quota for all Outlook Web App accounts is 100mb.
Advanced (1000mb) and MS Exchange (5000mb) email accounts can be purchased by calling CALCO support 01599 534964.
Setting Out Of Office Replies.
Simply click Options, then Set Automatic Replies. Once you have set this, dont forget to take it off again when you are done with it.
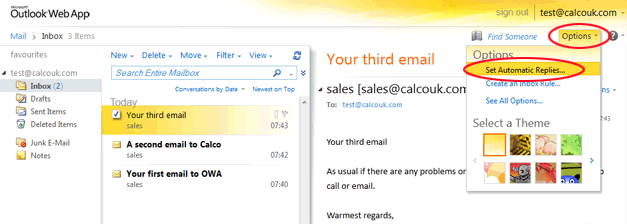
Figure 3. Setting Automated Replies in Outlook Web App
Setting Up Rules
Sometimes you need to perform AN action ON some condition. This is called applying a RULE.
For example, supposing I dont want any messages containing the word "cephalopod" and I would like to delete them without reading them.
Go to OPTIONS click CREATE AN INBOX RULE
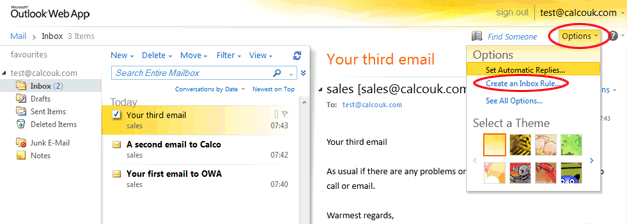
When the new window opens under the INBOX RULES tab (it looks like a button) click NEW...
When the new window opens
Select the CONDITION
When the message arrives, and SELECT [It includes this word or these words in the body]
Type your word(s) in the box provided
- in our example cephalopod
Then select the ACTION
Do
the following [Delete the message]
SAVE the rule
Adding a signature or "sig"
Appending your contact details at the end of every email can be a chore that is why the "signature" was developed. To add this feature to your webmail set-up ...
Go to OPTIONS then SEE ALL OPTIONS
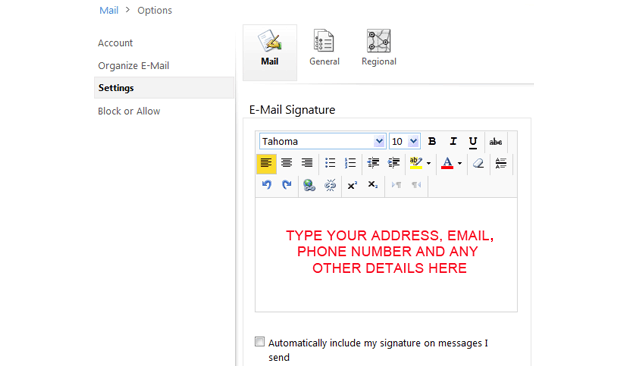
When the new window opens .. select from the LEFT hand list menu SETTINGS. You should now see the Signature panel. Fill the details you want your customers to see every time you send an email. Tick the box that says .. Automatically include my signature on messages I send. REMEMBER to click SAVE before leaving this window!
HOW TO SET UP YOUR EMAIL ACCOUNT
- Outlook 2003 - How to create a new Mail Account in Outlook 2003
- Outlook 2007 - How to create a new Mail Account in Outlook 2007
- Outlook Express- How to create a new Mail Account in Outlook Express (NOT Outlook)
- Vista and Windows 7 Email - How to create a new Mail Account in the mail programme that comes with Microsoft Vista
WEBMAIL ACCESS ADDRESS
For "starter" accounts ... Go to
http://login.livemail.co.uk - this replaces the old http://exchange2010.livemail.co.uk

